Making a Surfboard Rack for Your Bike - Part 3
 To calculate the length of pipe you need for the bottom horizontal, you need to add 1 to 1.5" to the width of your board. (This is the width of board + boardbag if you plan on using your boardbag with the rack.) Cut these pieces too short and you will not be able to fit your board into the rack.
When you're happy with the bottom vertical pieces, fit them into the elbows that were attached to the bottom of the inside verticals, and then attach the last two elbows to the other ends of the bottom verticals.
Next cut the outside verticals. These pieces need to be 2 to 3" longer than the inside verticals. Remember to add the difference in length that you calculated before. (If there was a difference) Once these pieces are cut to length, inset them into the remaining elbows.
It's a good idea to have a quick check to make sure your measurements are good. Will your board site parallel in the rack? Will your board (and boardbag) fit down into the rack with some room to spare? Take care not to rest a heavy board on your part finished rack or it may fall apart and you might get a nice ding.
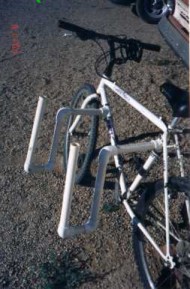
Now you should see your rack on your bike as it should work. Ok, its gluing time!
Gluing Time!
It is safest to do one arm at a time. That way you will not mix up your different length vertical pipes if you have them. Remove the rack from the bike leaving the tees in place. Glue the pieces together by applying the PVC glue to both the inside of the tee and the end of the horizontal / vertical pipes. Ensure that you keep the arm on the same plane so you end up with straight racks.
Once the glue has set on all the joints you can then glue the arm into the tee. Make sure you are gluing the correct arm into the correct tee if you had a measuring difference earlier. Make sure that the Verticals are 90 degrees to the ground. Once you're happy give the glue time to dry.
Final Steps
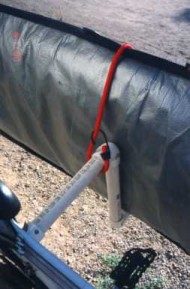
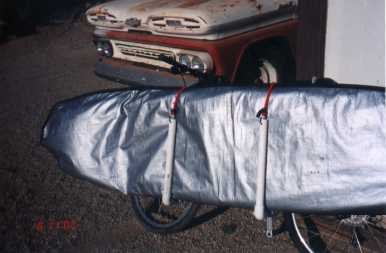
Now that the racks are fully secured to the bike, you need to drill a couple of holes that are used to attach the bungee cords when transporting your board. Drill a small hole about 1/2" from the top of each of the outside vertical pipes. The bungee cord can wrap round the inside horizontal arm and loop round itself, loop over the board, and then be secured by hooking into these new holes. (See the images below).
The last step is an optional one and involves insulating the rack to prevent against scratches and dings. If you're going to use a boardbag to protect your board, you can skip this step. Place the insulation pipe around both the vertical pipes and the horizontal pipe at the bottom of the rack. Secure the Insulation with tape if required. It's simple, really.
Well, that's it for another how to guide. Take a look below at a finished rack in all its glory.
Article Source:
This how to article has been modified from its original, published in an article entitled "Do-it-Yourself Sidemounted Surfboard Rack for a Bicycle". The original article can be found at:
http://www.rodndtube.com/surf/info/surf_racks/BicycleSurfboardRack.shtml
Rack images and original source are courtesy of John L. Hermesman
Comments
If you'd like to comment on this article, please post here.